Give us a call for real time solutions.fast fulfillment and shipping on same day orders.
Sno Shield

Time To Start Your Project: How To Get The Easiest Snow Guard Installation

You have done your measurements, and you have ordered the right amount of guards for your particular project, which means it is time to get to work installing your guards. Proper installation is not hard, but you need to take your time and pay attention to your work to make sure that things run smoothly. These simple steps in the installation process will help you get the job done right the first time.

Take Time To Clean

First and foremost, you have to take some time to clean the area where you are going to put your snow guards. Using isopropyl alcohol will get rid of the dirt and grime that interfere with the adhesives ability to set properly, and will make a much better seal between the guard and the roof. You will want to use a soft, clean rag to do the cleaning and you will probably need to change rags every three or four guards so you do not just move dirt from one spot to another.

Apply Adhesive Liberally

Adhesives are cheap, but guards are not, and neither is the damage that is caused when snow and ice fall into your yard or on your family. Be sure that every square inch of the bottom of the guards are covered with the adhesive that you are using, even if that means using a gloved hand to spread the glue. If there is a lot of extra glue on the bottom of the guard, do not worry; that glue will come in handy later on.

Press, Do Not Set

Once the glue is on the guard, make sure that you press the guard in place, and do not just set it down on the roof. Pressing the guard down helps the glue to make a better seal, by destroying air pockets under the guard, and it will also force some of the excess glue out around the sides of the guard. You will be using this extra glue to make a seal around the base of the guard that is water tight.

Take Your Time

Finally, the easiest way to do this job is to take your time. The installation should take a few hours, and trying to save fifteen minutes by hurrying through the process is not worth the risk. Completing the job will bring a great sense of pride in a job well done, and you should be able to save a lot of money in the process. If you are concerned that you are not doing the job correctly, look for any number of installation guides online for your brand and style of guard.

Common Snow Guard Installation Mistakes: Tips For Avoiding Costly Errors

To avoid the high cost of having someone else install a snow guard system, many homeowners opt to do the project themselves. The process is pretty easy and straightforward, and if the homeowner has some background in minor repairs, the project should go off without a hitch; however, there are still some common mistakes that are made. Avoiding the common mistakes can save homeowners time and money having to replace the work that they have already done and ensure that they have the protection that they need for their home.

Improper Spacing

Every package of snow guards will come with the manufacturer’s instructions for how the guards should be installed, including how far apart they need to be. These numbers are not just recommendations, they are tried and tested measurements that determine the optimal spacing to provide the best coverage, at the lowest price. Spacing the guards too far apart leaves parts of the roof vulnerable and homeowners wind up with large sheets of ice and snow sliding down their roofs when they thought the roof was protected.

Improper Measurement

Alongside the spacing issue, many homeowners underestimate how many guards they need for their home. Usually this is due to a mistake in the measurements taken before they place their order, and so they do not have enough guards to complete the job. It is very important that the homeowner order another box to finish the job, rather than trusting they can stretch the guards that they have to give the coverage they need.

Improper Setting

Since most high end snow guards are now made from polycarbonate materials, the recommended installation technique is a strong adhesive. This protects the roof from damage that might be caused by screwing the guards into the metal, and the quality adhesives are just as strong. Where homeowners fall short is not allowing the adhesive to set properly, and so the glue does not make the kind of bond that it needs to keep the guard in place. The adhesive might hold for a light snowfall, but the catastrophic failure will eventually occur, and the guards will come loose.

Homeowners must be sure to follow all of the instructions, including cleaning the area to be glued and set timers, so that their guards attach firmly. Common mistakes made during installation can be easily avoided. By following the instructions closely, homeowners can get the coverage they need during heavy snow, and save money by doing the work themselves.

Calculating The Number Of Guards You Need: Numbers You Should Have Handy

Once you have made the decision to make your home a safer place by installing snow guards to keep large sheets of snow and ice from falling to the ground, you have to make a decision about how you want the guards installed. Paying someone else to do the work frees you up to do other things, but it can be very costly, and most of the guards can be installed with tools that you may already have around your home. If you do decide to do the work yourself, you will need to do some calculations to determine how many guards you need.

General Roof Information

First you need to know some general information about your roof. These are numbers that you might be able to find in your mortgage paperwork or any other papers you have laying around from other work that you have had done on the roof. You need to know the length of the roof, in feet, as well as the width of the roof from eave to apex. In addition, you need to know the pitch of the roof, as that has a significant impact on the weight that the guards are expected to hold and the total number of guards that you will need.

Rib Spacing

Metal roofs do require an extra measurement, that of the spacing between the ribs all along the width of the roof. The wider the spacing is, the more guards you will need, as there will be fewer natural breaks along the roof to slow the slide of the ice and snow from the roof to the ground. Make sure that you get accurate measurements, especially if you have to order the guards, because if you do not have enough guards, your roof’s protection will be suspect.

Snow Load

Finally, you will need to do some research into the snow load for the area where you live. This number will be expressed in PSF (pounds per square foot), and there are several different places that you can find this information. The best thing to do is check with your city’s planning and zoning office to find out what the local requirements are, but there are online resources that can help you find your snow load as well. The greater the load, the more snow guards you will need, so, again, accuracy is key.

The installation of snow guards will help to protect your family and your property from harm when snow starts to fall, but you need to do some work to make sure that you have enough guards. Simple calculations and the right numbers are all that you need to get started.

Keeping The Home Safe During Snowfall: Three Ways To Manage The Roof

Snowfall can cause all kinds of damage to the roof and it remains dangerous as long as it stays on top of the house. The longer the snow stays on the roof, the greater the chance that it will turn in to ice and fall in a deadly sheet, but even loosely packed snow can cause personal injury and property damage if it falls off the roof without being slowed first. Typically there are three ways that homeowners can deal with the snow and keep their homes safe.

Shoveling

One very common way to take care of the snow is for homeowners to climb on the roof and shovel the snow off themselves. This tactic works in areas where the snowfall is irregular and for homes that have very slight inclines. The problem is that homeowners need a safe way to get on the roof to do the shoveling, and that is not very easy when there is ice and snow on the ground. Shoveling should be seen as a last resort, or something to be used in an area where homes are likely to only see snow once or twice a year.

Pipe Guards

A common type of retaining method for homes is the pipe guard or snow rail. This type is basically a pipe wall that goes around the outside of the roof. The piping is installed near the edge of the roof and breaks up big pieces of ice and snow as they begin to fall from the roof to the ground. These are commonly found in areas with very high levels of snowfall that build up high enough to be stopped by the pipe walls. There is an issue where snow and ice can be in a thin enough layer that it slips under or between the pipes in the wall, and that makes the wall a lot less useful than some of the other methods. Homeowners with this type of snow guard may wish to make a change by installing snow breaks on the reach from the pipe to the roof, or installing snow guards with adhesive to help stop the smaller snow falls.

Snow Shields

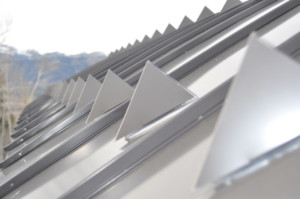
Finally, there are snow guards that provide a much more stable and consistent level of protection for the home. These snow shields are a series of small shapes, usually either an “L” or a triangle, that breaks snow and ice into several very small pieces as the sheet moves down the roof. The triangular guards can retain hundreds of pounds of snow, making the sliding snow and ice more manageable before it hits the ground, and providing the best level of protection for homeowners. Most snow shields are simple enough to install that homeowners can do the work on their own.

Protecting the home and property from damage caused by snowfall is the responsibility of every homeowner, and these methods for dealing with the snow can ensure a higher level of safety than an unprotected roof.

Go to Top